The components include:
- EBS Vision database
- Informatica PowerCenter 9.0.1
- Data Warehouse Administration Console (DAC)
- OBIEE 11.1.1.5
- OBIA 7.9.6.3
I recently rebuilt my EBS instance. I put my last go at it on a removable disk and seem to have misplaced it.
This will be part of a series of posts describing the entire process. I don't do it often enough and so I have to "remember" what I did, now I'll have my own reference.
Environment
As usual, this is running in a VirtualBox virtual machine.
- Host: Ubuntu 11.04, Natty Narwhal
- VirtualBox: 4.1.2
- Guest: Oracle Enterprise Linux (64 bit)
Linux oracle-web-tier 2.6.32-200.13.1.el5uek #1 SMP
x86_64 x86_64 x86_64 GNU/Linux
- Installed software: 11gR2 Database, OBIEE 11.1.1.5, Oracle Web Tier
I grabbed the download from edelivery, file name is: V26109-01.zip.
Other references:
- OBIA 7.9.6.3 Documentation Library
- OBIA Installation Guide for Informatica PowerCenter Users Release 7.9.6.3: Specifically this section, Installing Informatica PowerCenter Services.
Step 1, create a database account.
CREATE USER infa IDENTIFIED BY testing
  DEFAULT TABLESPACE users;

GRANT DBA TO infa;
**Note I have given DBA privileges, this is not necessary.**
It is simply easier, for now, to do it this way.
Step 2, unzip the files on your system.
It is recommended that you create an OS user specific to this task. I am using my previously existing oracle (dba, oinstall) account
Step 3, run the install.sh file
[oracle@oracle-web-tier infa_zips]$ ./install.sh OS detected is Linux unjar task is in progress............. unjar of ESD completed..... Do you want to continue installation (y/n) ? y Starting installation ... \*************************************************************************** \* Welcome to the Informatica 9.0.1 HotFix 2 Server Installer. * \*************************************************************************** To verify whether a machine meets the system requirements for an Informatica installation, run the Pre-Installation System Check Tool (i9Pi) before you start the installation process. You can find the i9Pi tool in the following directory:/i9Pi Before you continue, read the 9.0.1 HotFix 2 Installation Guide and Release Notes. You can find the 9.0.1 HotFix 2 documentation in the Documentation Center at http://my.informatica.com Configure the LANG and LC_ALL variables to generate appropriate code pages and create and connect to repositories and Repository Services. Do you want to continue? (Y/N)Y Installer requires operating system Linux version 2.6 and later. Current operating system Linux version 2.6. Current operating system meets minimum requirements. Select a choice : 1. Install Informatica 9.0.1 with Hot Fix 2 or Upgrade from a previous version of Informatica to Informatica 9.0.1 with Hot Fix 2 2. Apply Informatica 9.0.1 Hot Fix 2 to existing 9.0.1 install. Enter the choice(1 or 2):1 ----------------------------------------------------------- Checking for existing 9.0.1 HotFix 2 product installation. Select (G)UI mode (needs X Window support) or (C)onsole mode (G/C):G Launching installer in GUI mode ... Preparing to install... Extracting the JRE from the installer archive... Unpacking the JRE... Extracting the installation resources from the installer archive... Configuring the installer for this system's environment... Launching installer... Preparing SILENT Mode Installation... =============================================================================== Informatica 9.0.1 Services HotFix2 (created with InstallAnywhere) -------------------------------------------------------------------------------
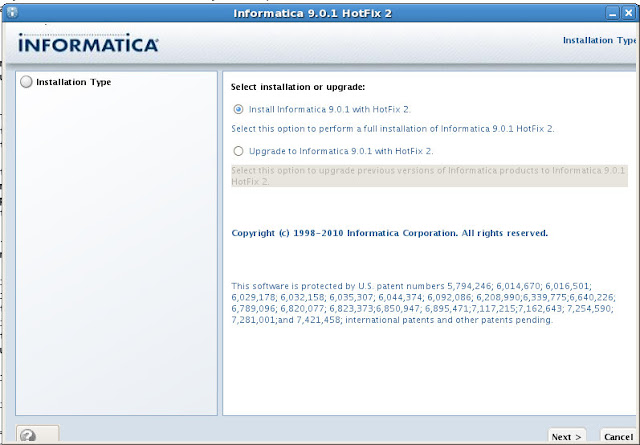
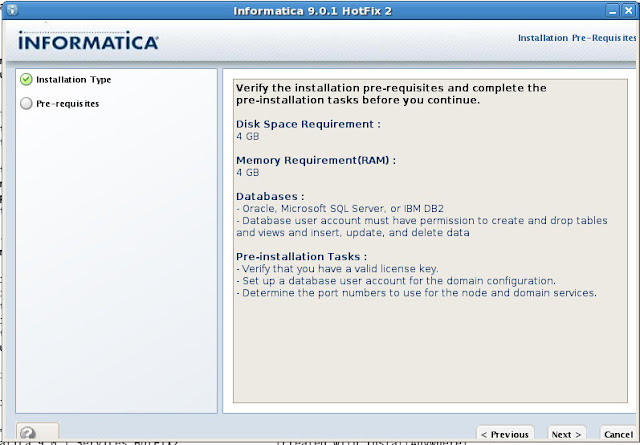
System Requirements:
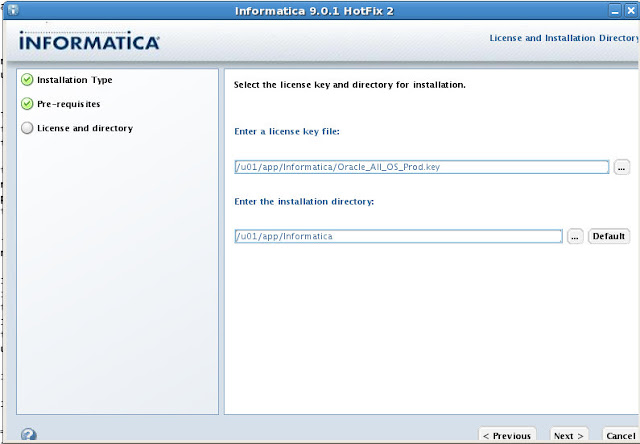
License Key and installation directory:
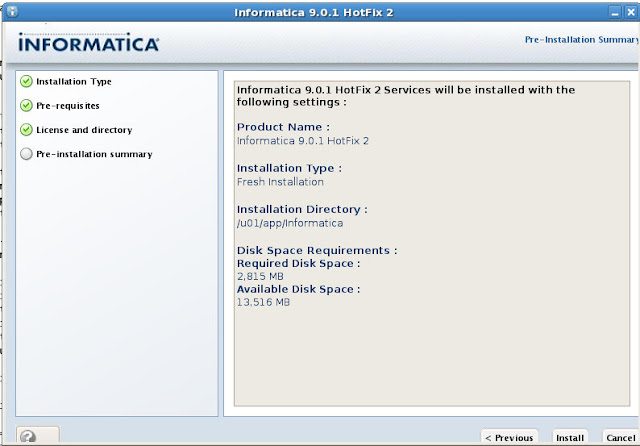
Confirmation:
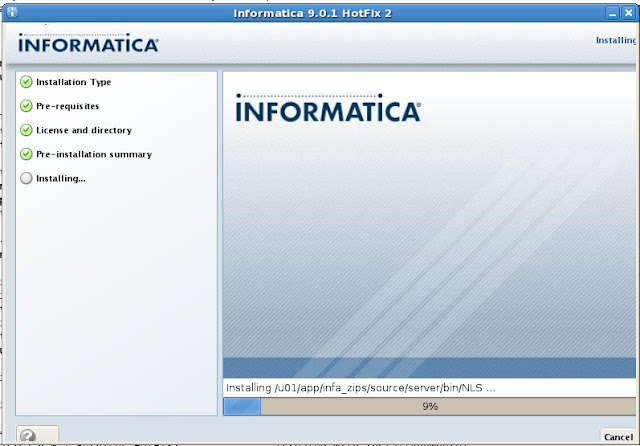
Running...
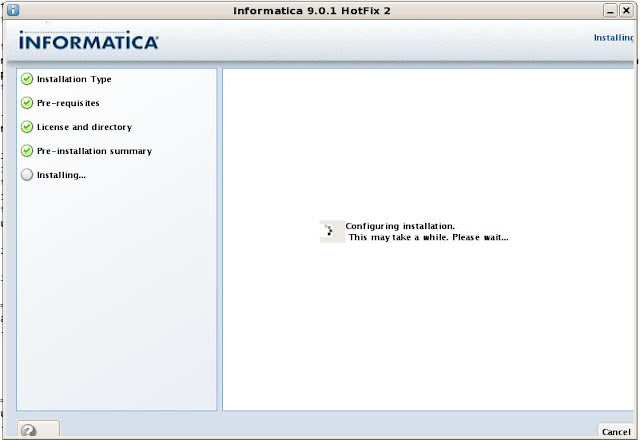
Configuring...
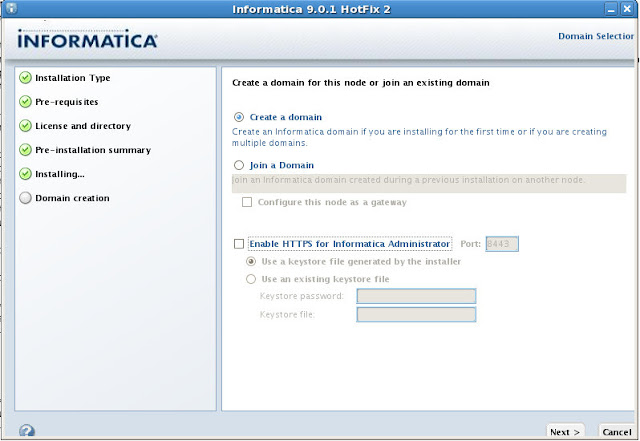
Create a domain and Enable HTTPS. Enable HTTPS is checked by default, I won't be using it.
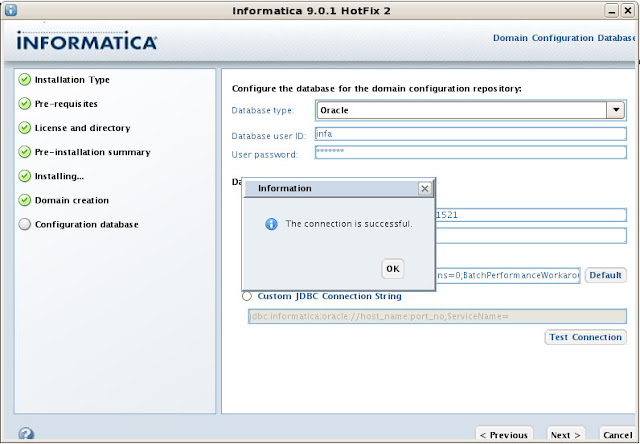
Configure the database connection and JDBC URL
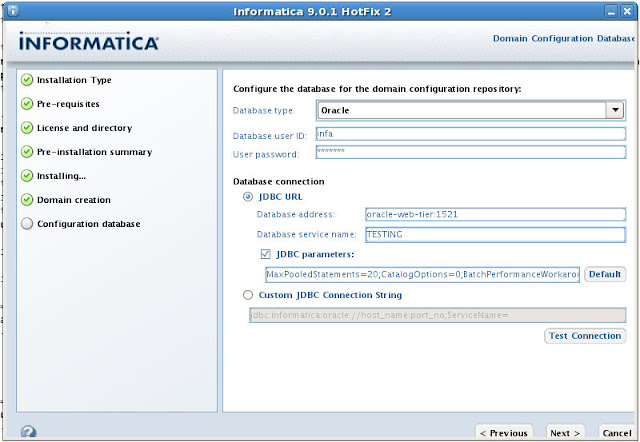
Testing the connection...
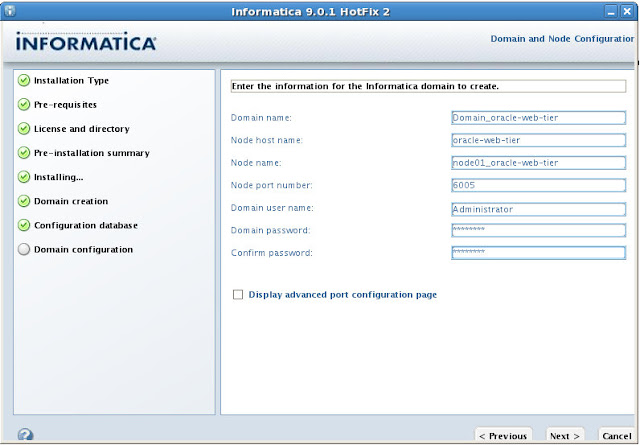
Informatica Domain. I'm going to accept the defaults:
Summary
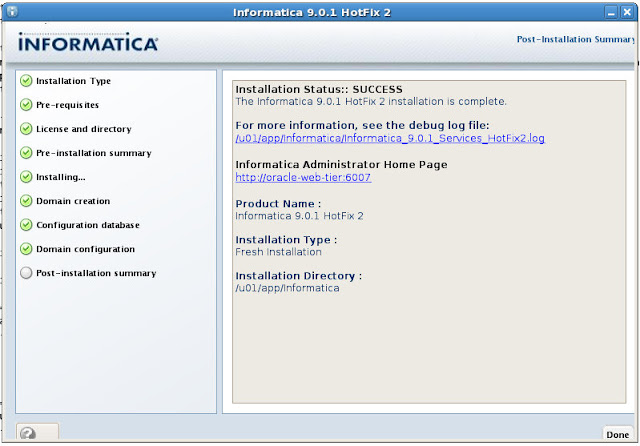
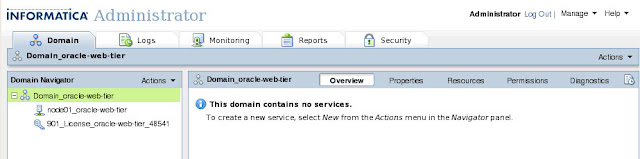
===============================================================================
Configuring Installation...
---------------------------

 [==================|==================|==================|==================]
 [------------------|------------------|------------------|------------------]

Installation Complete.
To verify your installation, open up http://localhost:6007/administrator/, username is administrator and the password is the one you supplied during installation.
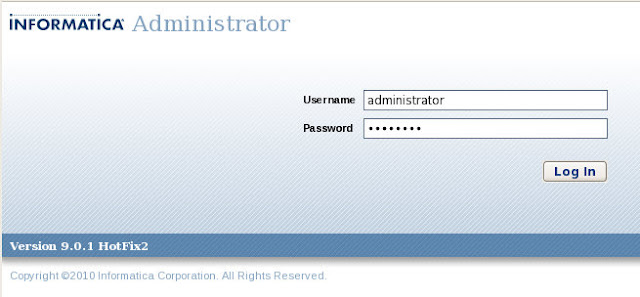
You'll be redirected to this page.
Next steps will be to cover the Information Repository Service and Informatica Integration Service. That of couse, is later.
4 comments:
Good stuff with the screenshots. particulalrly the one on Linux... Does Infa supply a similar 'step-by-step' one too ?
Did u have it for the comlpete installation ?
@Nik
If you're talking about the DAC and all the client tools, I'm working on that as we speak.
As for infa, I have no idea. One of the reasons I am doing this is because I have found the documentation out on the tubes (by the software creator) to be poor, at best.
chet
@Nerd
after installation you said that you will walk through the informatica admin console configuration. but i didnt found the document in your blog can you please provide me the link for it?
thanks,
Ram
@ram
I never got around to it (posting it). Let me see if I can find something though, I'm sure I have my notes somewhere.
chet
Post a Comment