Case in point, I was going through and trying to clean up the physical and BMM layers. Our physical model will now be shared between multiple projects. So how best to do that?
Using aliases along with naming conventions and display folders can help. By doing this, I will be able to "unhook" the source table from any and all joins. The goal is to keep these free...the aliases will be used to join to their respective tables (aliases).
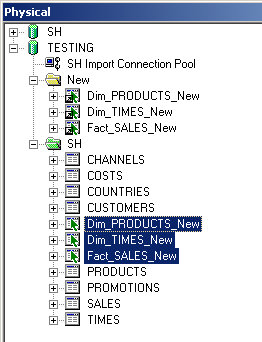
The naming will be something like:
Dim_<source_table_name>_<subject_area>To further organize them, I will put them in a Display Folder.
Fact_<source_table_name>_<subject_area>
Outrigger_<source_table_name>_<subject_area>
Bridge_<source_table_name>_<subject_area>
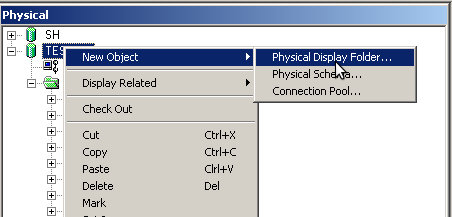
I'm just going to create one called "New."
I'm using the SH schema here, so it should be easy to follow along.
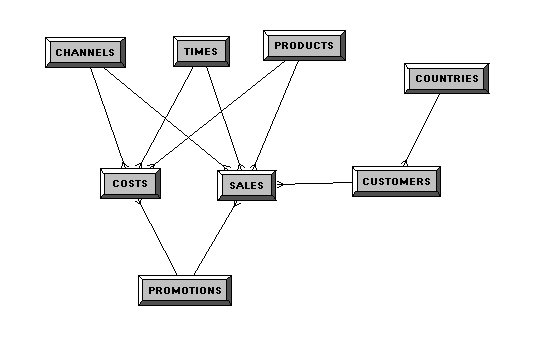
Next up, I'm going to create aliases for all my tables. For the sake of brevity and my sanity, I'm only going to use SALES, PRODUCTS, and TIMES.
When I initially started to clean things up, I would screenshot the Column Mappings section of the Logical Table Source. Fun right? There has to be a tool for this. Sure enough...
OK, this post has been sitting here all day...I'm cutting to the chase now.
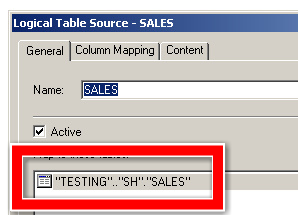
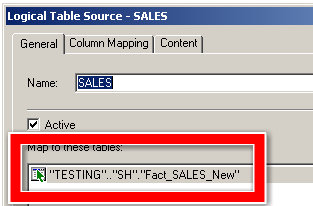
So I've hooked up (joined) all my new tables. Now I just want to replace them. I could do it by hand, but what fun would that be. Here's the source for SALES.
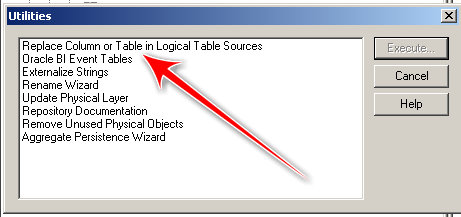
If you go to Tools -> Utilities, you'll see this screen and the fun little tool we'll use for this exercise:
Now make sure you select "Replace whole table." On the left side, select the table you want to replace, on the right side, select the table you will replace it with.
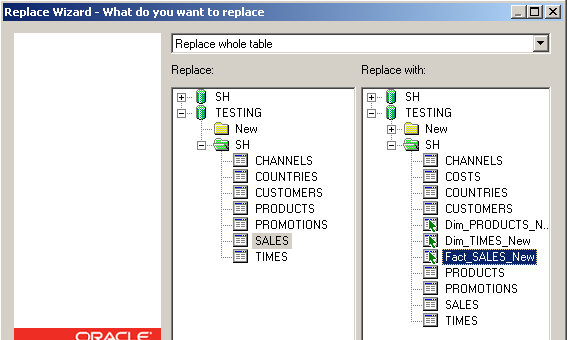
Hit Next.
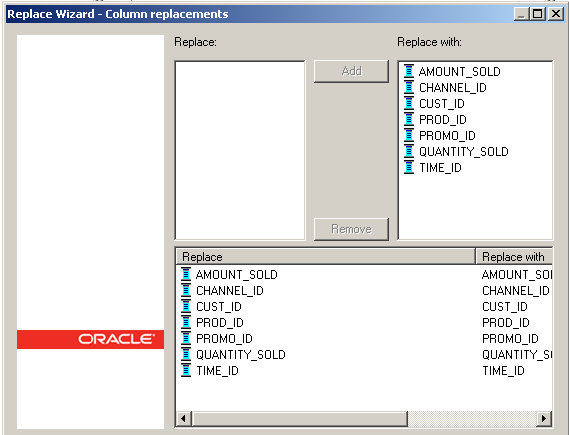
Blah blah blah, which translates into the column mappings. Since we are replacing the source table with a copy of itself, this part is easy.
Here you get a nice summary of what the tool will actually be doing.
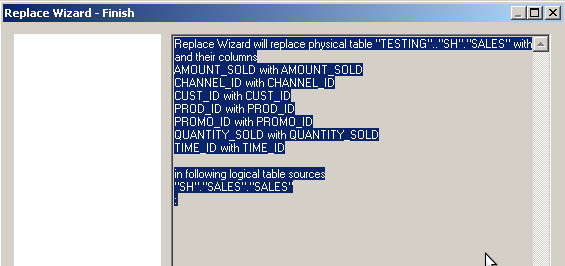
Hit Next and voila!
Now, what does this buy you?
Since you are now sharing your physical layer with multiple Subject Areas, you've added a layer of abstraction to protect yourself. Let's say a new column was added to SALES. After you've updated your physical layer, you are now free to either keep the others the same or add it to that particular Subject Area. For my (mythical/theoretical) example, I just need that new column in one Subject Area, so I'll just need to pull that into the BMM and I'm done.
An even better example would involve joins. Maybe Subject Area 1 is based on one particular set of joins and the others are not. This should allow you to easily handle this kind of scenario.
I do apologize for this post breaking up as it did. I had the best intentions in the world this afternoon. Hopefully I got the gist of the tool across, if not, yell at me and I'll update it later.
No comments:
Post a Comment